What is a Facebook Business Page?
A Facebook Business Page is a public profile specifically designed for businesses, brands, organizations, and public figures to connect with their audience on Facebook. It allows businesses to share content, engage with followers, and use various tools for promotion and advertising. These pages enable companies to run targeted ads, access analytics, open a Facebook Shop, and much more, thereby enhancing their online presence and marketing efforts.11Steps to create a business page
Step 1: Choose or Create a Personal Facebook Account
Before you can create a Business Page, you must have a personal Facebook account. Use your existing personal account or create a new one with your work email to keep your personal and professional lives separate.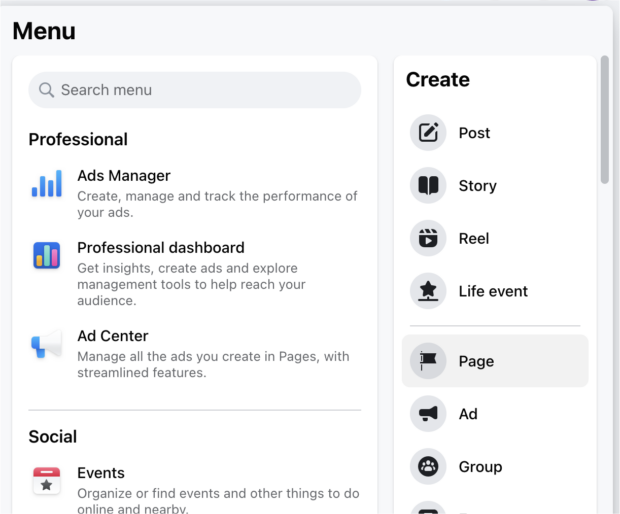
Step 2: Enter Your Business Info
After logging into Facebook, navigate to the "Create a Page" section. Choose a name for your Page, typically your business name, and select the category that best describes your business. Write a compelling bio with strategic keywords for better visibility.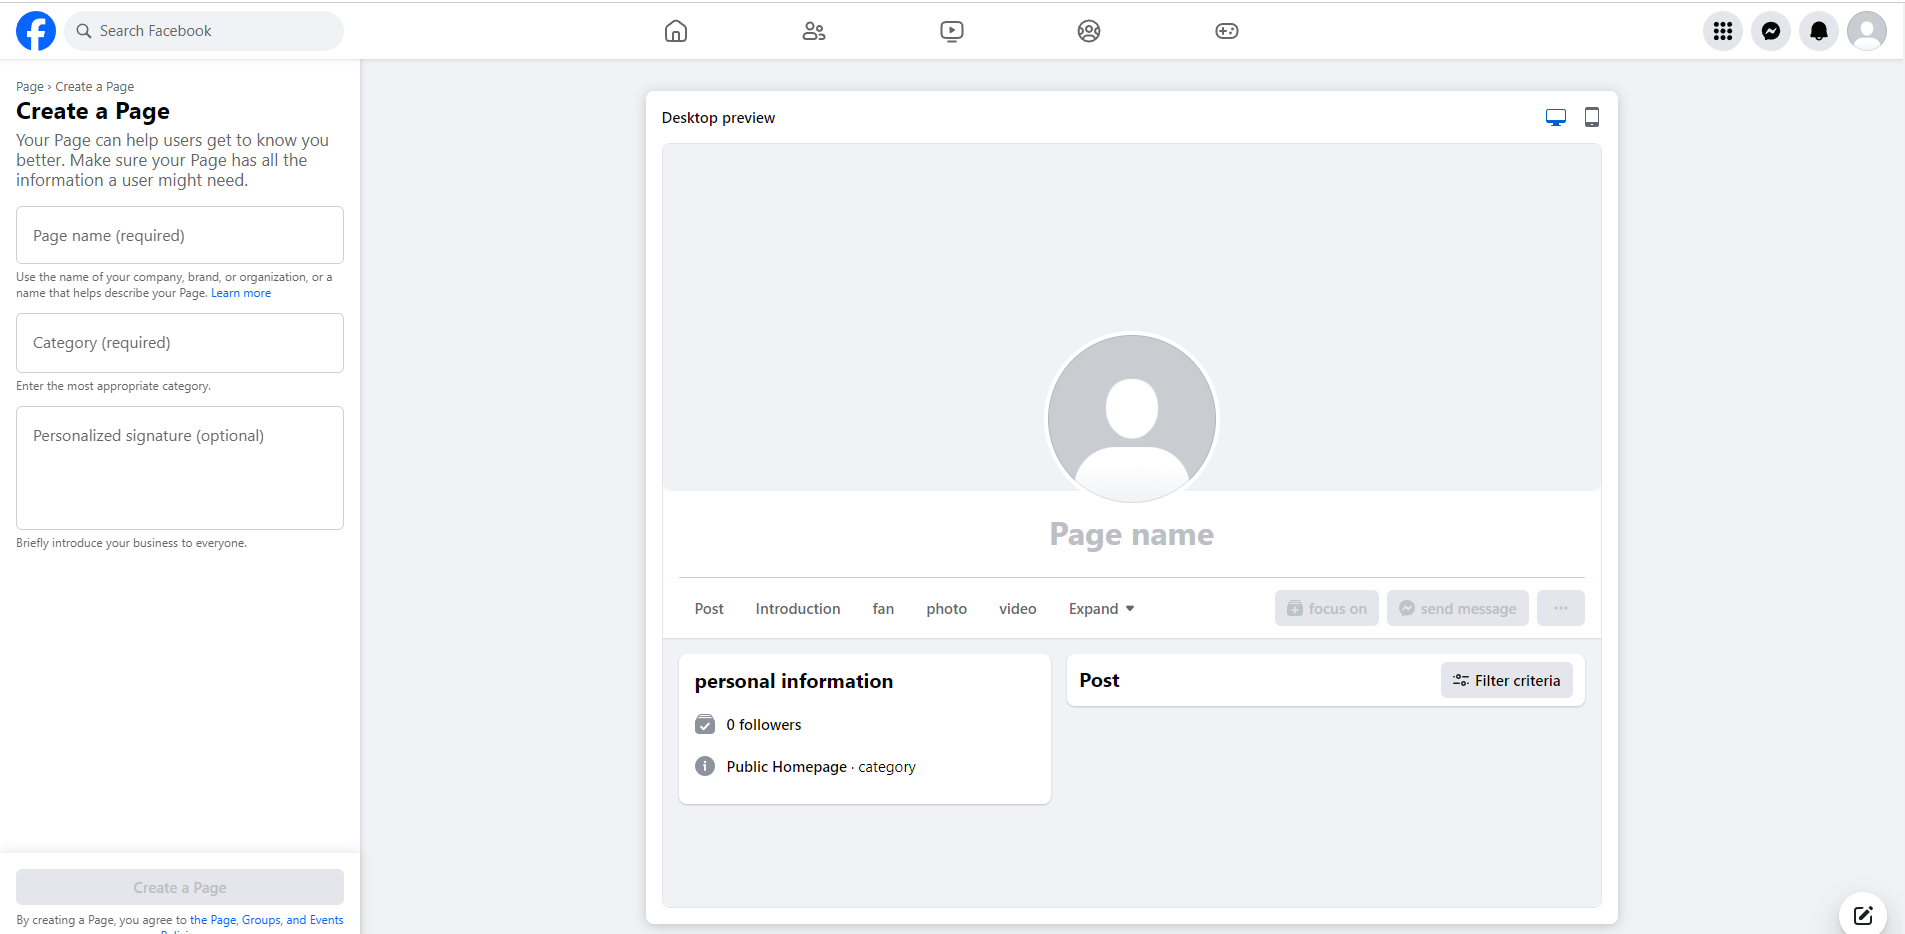
Step 3: Add Contact Details
Provide your business's contact details, including website, phone number, and email. If you have a brick-and-mortar location, add your address and business hours. This information will be public, so ensure it's accurate and you're comfortable sharing it.Step 4: Add Visuals and an Action Button
Upload a high-quality profile picture, like your company logo, and a visually appealing cover photo that aligns with your brand identity.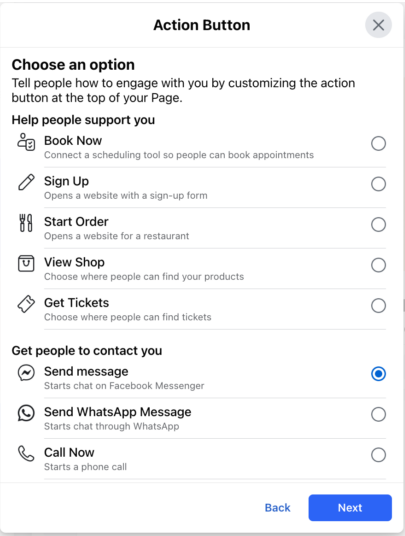
Add a call-to-action button to encourage visitors to take a specific action, such as making a purchase or booking a consultation.
Step 5: Connect to WhatsApp (Optional)
If you use WhatsApp for business, you can add a WhatsApp button by entering your business number and verifying it with a confirmation code.Step 6: Invite Friends to Like Your Page
Utilize your network by inviting friends to like your Page, which can help kickstart your Page's growth and visibility.Step 7: Set Notification Preferences
Adjust your notification settings to ensure you're alerted about activity on your Page. This helps you remain responsive to messages, comments, and other interactions.Step 8: Customize Your Page
Further customize your Page by adding more detailed information about your business.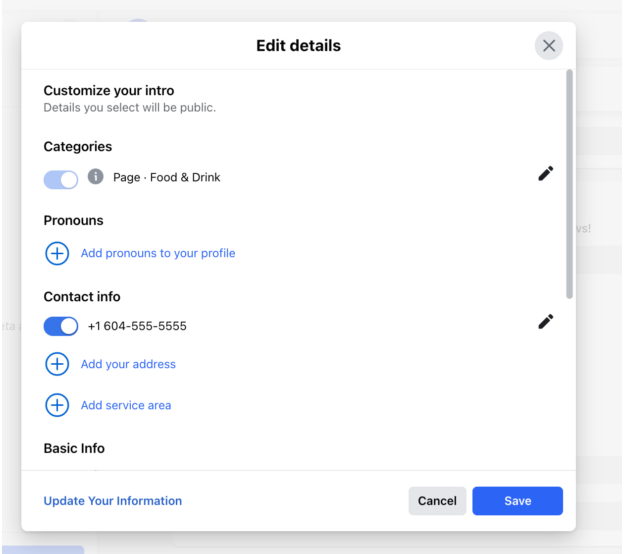
You can include a price range, list of services, and other relevant details that help customers understand what you offer.
Step 9: Adjust Privacy Settings
Go to the Settings and Privacy section to configure who can post on your Page, whether people can leave reviews, and other user interaction settings. Tailor these to your business's needs and comfort level.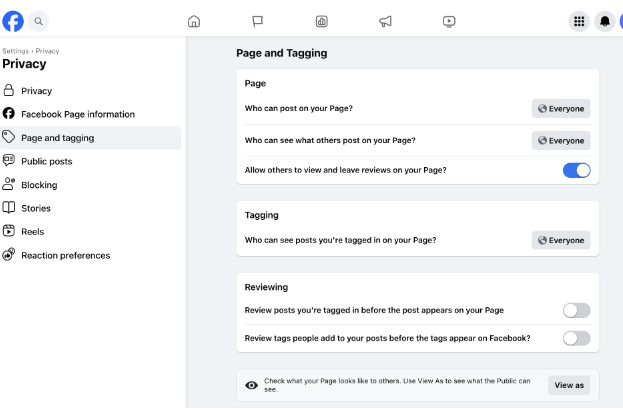
Step 10: Link Your Instagram Page
If you have an Instagram Business Account, link it to your Facebook Page to manage both platforms from one place, making it easier to share content and analyze performance.Step 11: Start Posting Content
Begin populating your Page with engaging content. Post updates, photos, links, and start conversations with your audience. Use a variety of content types to keep your Page dynamic and interesting.After completing these steps, your Facebook Business Page will be set up and ready to serve as a hub for your business on social media.
Managing Your Facebook Business Page
Adding an Admin to a Facebook Business Page
Step 1: Login as your Page
Navigate to your Facebook Business Page by clicking on its name from your personal account's menu.Step 2: Open the Page Access Menu
On your Business Page, click on "Settings," then select "Page Roles" or "Page Access" depending on the interface.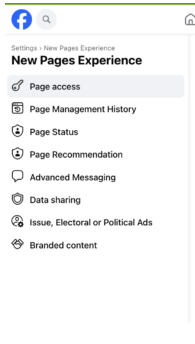
This will take you to the section where you can manage who has access to your Page.
Step 3: Add New Admins
In the Page Roles section, you will find various roles you can assign, including Admin. Click on "Add New" or "Assign a New Page Role," and enter the name or email address of the person you want to add as an Admin.Decide the level of access: For full admin access, ensure you select "Admin" from the dropdown menu. Admins have complete control over the Page, including the ability to post as the Page, respond to messages, create ads, see which admin created a post or comment, view insights, and assign Page roles.
Send the invitation: Once you've entered the details, click "Add." Facebook will send an invitation to the person to accept the role. They must accept the invite before they can start performing admin duties on the Page.
Step 4: Confirm Your Selection
You may need to enter your password to confirm the addition of a new admin to the Page. This is a security measure to ensure that only authorized individuals can make such changes.Deleting a Facebook Business Page
Step 1: Log in to your Facebook Business Page
Access your Business Page from your personal account by clicking on the Page's name in the menu.Step 2: Navigate to the Delete or Deactivate Menu
Once on your Business Page, go to "Settings." Look for a section called "General" or "Page Info," where you will find options to delete or deactivate the Page.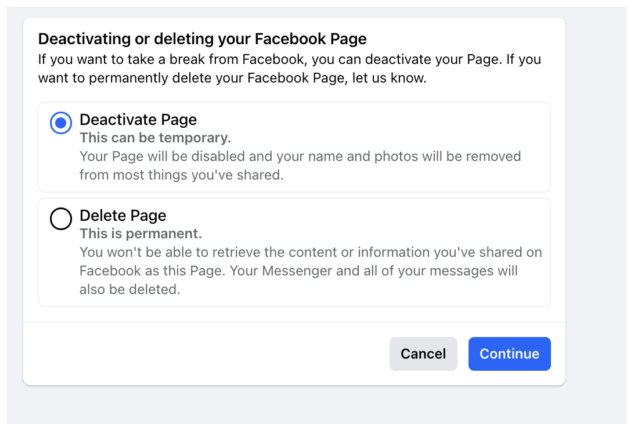
Step 3: Choose Between Deactivation or Deletion
You'll be presented with two options: "Deactivate Page" or "Permanently Delete Page." Deactivating the Page will hide it from public view but preserve its information for potential reactivation in the future. Deleting the Page will remove it permanently after a grace period, during which you can cancel the deletion if you change your mind.Step 4: Confirm Your Choice
If you choose to deactivate, follow the prompts to confirm deactivation. If you choose to delete, you may be given the option to download a copy of your Page's content before it is removed. After selecting "Delete," you will have to confirm the action by entering your password.Step 5: Wait for the Deletion to Process
If you've chosen to delete your Page, Facebook may provide a grace period of a few days to a few weeks during which you can cancel the deletion process. If you do nothing, the Page will be permanently deleted after the grace period ends.Remember, once a Page is permanently deleted, it cannot be recovered, so make sure you want to proceed with this action before confirming the deletion. Deactivating a Page is a reversible action that allows you to hide your Page temporarily without losing any information or content.


